Introduction

This is a variation on the classic Adventure game in which the player guides a character from scene to scene, picking up clues, to reach a goal. In this case, the player guides Thomas around his house searching for a hidden birthday present.List of techniques
- Importing backgrounds to the Stage
- Switching between backgrounds
- Using the keyboard to navigate between background scenes
- Adding text to a background
- Using broadcast and receive blocks to send messages between scripts
- Showing and hiding Sprites
- Duplicating Scripts
- Copying Scripts from one Sprite to another
- Shrinking and Growing Sprites in size
- Switching Sprite costumes
- Using say and think for speech and think bubbles
- Using variables to communicate a Sprite's co-ordinate position to a Script
- Using glide to move a sprite
- Ending a game with stop all
Tutorial
| Our first task is to create the scenes (or rooms) in which the adventure is set. After loading the program, click the Stage icon beside the Sprite List Area. Then click the Backgrounds tab, and then the Edit button beside the icon for the Stage background |
 |
 |
This takes us to the Paint Editor. We could paint our own backgrounds, but to save time and effort we will import images for our scenes. Click the Import button. |
| Double-click the Indoors folder Choose an image for your living room (in my case room3), click on the image and then click OK |
 |
 |
The image will be imported into the Paint Editor. You can use the paint tools to add to the image if you wish, but for now click the OK button |
| We have now replaced the original blank scene with our room image. We need more than one room in our adventure so click the Import button at the top of the backgrounds list area |
 |
 |
Choose an image for the bedroom for your adventure. Initially, I chose bedroom1 but changed my mind later and selected bedroom2 as I felt this was more appropriate for main character. Click OK when you have clicked on the image you require. |
| Use the Import button to import another two 'rooms'. In my case, I have imported a kitchen scene, and a garden scene from the Nature folder. |  |
 |
For my adventure, I wanted another scene inside a shed. There was no suitable image in the Scratch backgrounds folder and so I used Google image search to find a suitable image and saved it to my desktop. |
| To import this image into Scratch, I clicked the Import button and then clicked the Desktop button. I then clicked the image I had downloaded and then the OK button. |  |
 |
This gave me five 'rooms' for my adventure. You can have as many or as few as you want - but the more you ass, the more programming you need to do. Note that you can change the image shown on the Stage by clicking the icon for the image in the Backgrounds List Area |
| To help the player navigate around the Adventure, we will add some information to each background image. Click the first background image icon and then click the Edit button beside it. |
 |
 |
Click on the Text Tool in the Toolbox and then type K = Kitchen B = Bedroom Drag the square black handle above the first letter of your text to move it to the bottom of the canvas in the Paint Editor. Click OK when done. NOTE: Only one text block can be included on a background image |
| Now click the icon for the second background image (in my case the bedroom) and then click the Edit button beside it. NOTE: At this point I changed my background image from bedroom2 to bedroom1 by clicking Clear and then Import. |
 |
 |
Use the Text Tool to add L = Living Room K = Kitchen to the bottom of this scene and then click OK |
| Using the same method, add L = Living Room G = Garden to the kitchen scene |
 |
 |
K = Kitchen S = Shed to the garden scene |
| and G = Garden to the shed scene |
 |
 |
We now need to write the Scripts which will take the player from room to room (or scene to scene) Click the Scripts tab above the Backgrounds List and then click the Control button above the Blocks Palette This will show all the Control Blocks in the Blocks Palette. |
| From the Blocks Palette, drag a when Green Flag clicked block into the Script Area for the Stage And then drag a when [space] key pressed block into the Script Area. |
 |
 |
Now click the Looks button above the Blocks Palette From this Blocks Palette, drag a switch to background [ ] block into the Script Area and attach it to the when Green Flag clicked block Click on the pane at the end of the switch to background [ ] block and on the pop-up list click the name of the first background image (in my case background1) |
| Drag a switch to background [ ] block from the Blocks Palette to the Script Area and attach it to the when [ ] key pressed block. Change the when [ ] key pressed block so it reads when [k] key pressed and change the switch to background [ ] block below it to read switch to background [kitchen] You can now test this new script by pressing the k key on the keyboard to see if it changes the background of the Stage to the kitchen background. |
 |
 |
We need to tell other scripts in the game that the background has changed and so to do this, click on the Control button above the Blocks Palette and from the Control Blocks Palette, drag a broadcast [ ] block into the Script Area and attach it beneath the switch to background [ ] block in the when Green Flag clicked script. Drag another broadcast [ ] block from the Blocks Palette into the Script Area and attach it beneath the switch to background [ ] block in the when [k] key pressed script |
| Click the pane in the broadcast [ ] block in the when Green Flag clicked script and then click new |  |
 |
In the Message name pop-up window, type living room and then press the OK button |
| In the pane of the broadcast block in the when k key pressed script, type kitchen and then click OK |  |
 |
We now need to create similar scripts for the other key presses to navigate around the adventure. We could repeat the same process but to save time and effort we will duplicate and then edit the script Right-click (Ctrl-click on a Mac) on the when [k] key pressed block and then click duplicate on the pop-up menu |
| Edit the new script so it reads when [L] key pressed switch to background [background1] broadcast [living room] |
 |
 |
Now keep duplicating and editing the script until you have create a total of five key press scripts: one for when the B key is pressed to switch to the Bedroom background, one for the G key to switch to the Garden and one for the S key to switch to the Shed background Make sure these scripts also broadcast a relevant message to tell any other scripts which scene is being shown on the Stage You can now test the scripts by pressing the relevant keys to check that the backgrounds change according to the key press. If there is a bug, check the relevant script to ensure it is instructing the program to switch to the relevant background. |
| We are now ready to start adding objects to the scenes. Click the Backgrounds tab and then click on the icon for the first background (alternatively you could press the L key to take you to the Living Room background) |
 |
 |
We don't need the Scratch the Cat Sprite in our game so right-click (Ctrl-click on a Mac) the Scratch the Cat icon in the Sprite List Area and then click delete on the pop-up menu |
| Click the Choose new sprite from file button above the Sprite List Area |  |
 |
Double-click the Things folder then click on the flower vase image icon and then click the OK button |
| Drag the vase Sprite so it is above the table in the Stage background image and then click the Shrink Sprite button above and to the left of the Stage Area. Keep clicking on the vase Sprite until it has shrunk to the right size. Then drag the Sprite so it appears to sit on the table. |  |
 |
We now need to write some scripts for this sprite so it will appear when the living room is shown and disappear when the player moves to another room. Click the Control button above the Blocks Palette and then drag a when Green Flag clicked block into the Script Area. |
| Click the Looks button to bring up the Looks blocks in the Blocks Palette. Drag a hide block and attach it to the when Green Flag clicked block in the Script Area |
 |
 |
Click on the Control button and from the Control Blocks Palette drag a when I receive [ ] block into the Scripts Area. Click on the pane at the end of this block and then click living room on the drop-down menu |
| From the Looks Blocks Palette, drag a show block and attach it below the when I receive [living room] block in the Script Area If you recall, the 'living room' message is broadcast when the player presses the L key on the keyboard. This script shows the vase sprite when the Living Room background image appears in the Stage Area. |
 |
 |
We now need to create some scripts to hide the vase when the player moves to any other room in the game. We could repeat the above procedure to create another script but to save time we will duplicate this script and edit it. Right-click (Ctrl-click on a Mac) on the when I receive [living room] block and then click duplicate on the pop-up menu |
| On the new script, change living room to bedroom on the when I receive [living room] block |
 |
 |
Remove the show block from this new script by dragging it into the Blocks Palette Area and releasing the mouse button |
| Now drag a hide block from the Looks Blocks Palette and attach it to the when I receive [bedroom] block in the Scripts Area |  |
 |
Duplicate this Script |
| Edit the new script so it reads: when I receive [garden] hide |
 |
 |
Add two further Scripts, one for the kitchen and one for the shed. |
| We are now ready to start adding objects to the other rooms. To save time and effort, we will duplicate this Sprite and its Scripts In the Sprites List Area, right-click (Ctrl-click on a Mac) on the icon for the vase Sprite. Then click duplicate on the pop-up menu. |
 |
 |
Click the icon for the new Sprite (Sprite2) and then click the Costumes tab above the Script Area. Click the Edit button beside the image for the Sprite |
| In the Paint Editor for this Sprite, click the Clear button |  |
 |
Now click the Import button |
| In the Things folder, click on the beachball image icon and then click OK |  |
 |
The image will be imported into the Paint Editor. As we do not want to edit the image, click the OK button |
| We will now position this Sprite in its appropriate room (the bedroom) Click the Stage icon beside the Sprites List Area, then click the Backgrounds tab and then click on the bedroom background image icon Alternatively, you could press the B key on the keyboard |
 |
 |
Drag the beachball Sprite to a suitable location in the bedroom (I've put it beside the bedside table) and, if necessary, click the Grow or Shrink Sprite button and then alter the size of the Sprite. |
| Click the icon for the beachball Sprite in the Sprite List Area and then click the Scripts tab above the Scripts Area to show the Scripts for this Sprite. |  |
 |
We need to amend the Scripts which make this Sprite appear and disappear. In the Script Area, drag the show block off the when I receive [living room] block and drag the hide block off the when I receive [bedroom] block |
| In effect, you now need to swap these two blocks over. Attach the hide block to the when I receive [living room] block and attach the show block to the when I receive [bedroom] block. Hopefully you will see that this tells the Sprite to become visible when the player goes into the bedroom and to become invisible when the player enters the living room |
 |
 |
Now change the Stage to the next room, in my case the kitchen. For now it doesn't matter that the vase and beachball Sprites are showing as we are not actually playing the game. |
| Duplicate the beachball Sprite |  |
 |
 Edit the new Sprite, and import the image of the cheesy-puffs Edit the new Sprite, and import the image of the cheesy-puffs |
| Drag the cheesy-puffs Sprite to an appropriate location on the stage and, if necessary, shrink the Sprite with the Shrink Sprite button |  |
 |
Edit the scripts for the cheesy-puffs Sprite so that it will show in the kitchen and hide in the bedroom |
| Duplicate the cheesy-puffs Sprite and change the image of the new sprite to one of a rock. Put the garden image on the stage and then drag the rock sprite to an appropriate location. |  |
 |
Edit the Scripts for the rock sprite so that it will show in the garden and hide when in the kitchen |
| Duplicate the rock sprite and change the image of the new sprite to a bike (in the transportation folder) |
 |
 |
Drag the bike Sprite to a suitable location on the shed background image on the stage. |
| Edit the Scripts of the bike Sprite so it hides in the garden and shows in the shed |  |
 |
We are now ready to add the main character to the game - the boy (or girl) Sprite which the player controls. Click the Choose new sprite from file button above the Sprite List Area |
| Double-click the People folder |  |
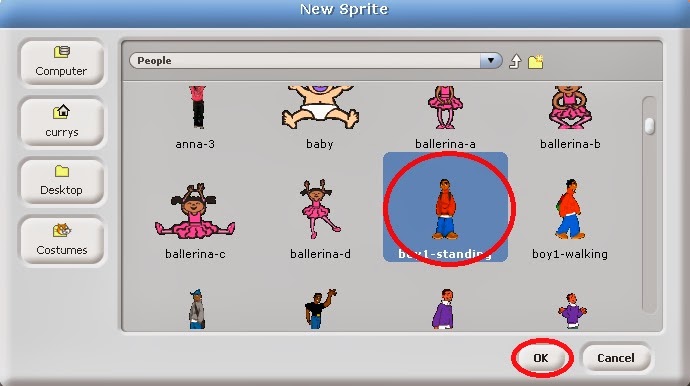 |
Click the boy1-standing image (or choose another of your own) and then click the OK button |
| Click the Costumes tab, then click the Import button. Now click the boy1-walking image and then click the OK button |  |
 |
Click the Scripts tab above the Script Area. Click the Control button and then drag a when Green Flag clicked block into the Script Area |
| From the Motion Blocks Palette, drag a go to x: [ ] y: [ ] block into the Script Area and attach it to the when Green Flag clicked block. Change the block so it reads: go to x: [0] y: [-65] This will place the boy Sprite in the middle of the stage, towards the bottom when the game starts. |
 |
 |
From the Looks Blocks Palette, drag a say [ Hello! ] for [2] secs block into the Script Area and attach it beneath the go to x: [0] y: [-65] block Change the block so it reads say [Hello, my name is Thomas] for [2] secs (or something similar) |
| Drag four more say blocks and attach them beneath the first say block. Change the blocks so they read: say [It's my birthday and my brother has hidden my present somewhere] for [3] secs say [Help me find it] for [2] secs say [Click on objects for clues] for [2] secs say [and move around the house by pressing keys] for [3] secs |
 |
 |
We now need to add a new script to each of the object Sprites Click the icon for the first (flower vase) Sprite and then the Control button Drag a when Sprite1 clicked block into the Script Area |
| From the Control Blocks Palette, drag a broadcast [ ] block and attach it below the when Sprite1 clicked block in the Script Area Click on the pane at the end of the broadcast [ ] block and from the drop-down menu select new ... |
 |
 |
Type walk for the message name and then click OK |
| Click the Variables button and then the Make a variable button Give the variable the name xpos and then click OK |
 |
 |
Attach a set xpos to [0] block to the end of the when Sprite1 clicked script |
| Make a variable called ypos and then attach another set [xpos] to [ ] block to the end of the when Sprite1 clicked script Change the second set [xpos] to 0 block to set [ypos] to 0 in the when Sprite1 clicked script |
 |
 |
From the Sensing Blocks Palette, drag an [x position] of [Sprite1] block and insert it into the [0] pane of the set [xpos] to [0] block in the Script Insert a [x position] of [Sprite1] block into the [0] pane of the set [ypos] to [0] block and change the block so it now reads set [ypos] to [y position] of [Sprite1] This script sends a walk message when the flower-vase Sprite is clicked and then stores the co-ordinates of the mouse in two variable (xpos and ypos). We will be using this information to guide the movement of the boy Sprite to the vase sprite. |
| Clearly it would be handy to use this script for all the other objects in the adventure. Fortunately, there is a quick and easy way to copy Scripts from one Sprite to another. Drag the when Sprite1 clicked block (and all the blocks below it) from the Script Area over the icon for the beachball sprite in the Sprite List Area and release the mouse button |
 |
 |
The script will spring back to the Script Area. Now click on the icon for the beachball Sprite |
| The Scripts for the beachball Sprite (Sprite2) will now be shown in the Script Area, including the Script which you just dragged and dropped. Notice that the block at the head of the new script has now changed to when Sprite2 clicked, but we'll need to change the set [xpos] and set [ypos] blocks. Click on the pane at the end of these blocks where is says [Sprite1] and change both blocks to [Sprite2] so they now read: set [xpos] to [x position] of [Sprite2] set [ypos] to [y position] of [Sprite2] |
 |
 |
Now drag this Script over the icon for the next Sprite (the cheesy-puffs - Sprite3) in the Sprite List Area |
| Click the Sprite2 (cheesy-puffs) icon in the Sprite List Area |  |
 |
and amend the Script in this Sprite's Script Area so it says when Sprite3 clicked broadcast [walk] set [xpos] to [x position] of [Sprite3] set [ypos] to [y position] of [Sprite3] |
| Drag and drop this script over the icon for the next Sprite (Sprite 4 - the rock) and amend its script to read when Sprite4 clicked broadcast [walk] set [xpos] to [x position] of [Sprite4] set [ypos] to [y position] of [Sprite4] |
 |
 |
Finally, repeat the process for the last object Sprite (Sprite5 - the bike) and edit its script to read when Sprite5 clicked broadcast [walk] set [xpos] to [x position] of [Sprite5] set [ypos] to [y position] of [Sprite5] |
| Nearly there!! We now need to add another Script to the boy-sprite to get it to respond whenever it receives the message which is broadcast whenever an object is clicked by the player (ie walk). Click the icon for the boy-sprite (Sprite6) and from the Control Blocks Palette, drag a when I receive [ ] block into the Script Area for the boy-sprite Edit the block so it now reads: when I receive [walk] |
 |
 |
From the Motion Blocks Palette, drag a point towards [ ] block into the Script Area and attach it to the when I receive [walk] block Edit the block so it reads point towards [mouse-pointer] Clearly, this will point the boy-sprite towards the object which has just been clicked by the player. |
| From the Looks Blocks Palette, drag a switch to costume [ ] block and attach it to the script Edit the block so it now reads switch to costu,e [boy1-walking] |
 |
 |
From the Motion Blocks Palette, drag a glide [ ] secs to x: [ ] y: [ ] block and attach it to the script. Edit the first pane of the block from 1 secs to 2 secs (Notice by the way that this block has by default already entered the current position of the Sprite in the Stage Area - we won't be using this for now but it is a useful feature) |
| From the Variables Blocks Palette, drag the xpos and the ypos label blocks into the relevant panes in the glide block so it now reads glide [2] secs to x: [xpos] y: [ypos] Remember, when the player clicks on an object Sprite its script puts the co-ordinates for the object into the two variables, xpos and ypos |
 |
 |
From the Control Blocks Palette attach a wait [1] secs block to the end of the script |
| From the Looks Blocks Palette, attach a switch to costume [ ] block to the end of the script and edit it to read switch to costume [boy1-standing] Insert another switch to costume [ ] block in the when Green Flag clicked script just below the when Green Flag clicked block This will ensure that when the game starts the boy-sprite's costume will show him standing rather than mid-walk. |
 |
 |
One last job to do - and that is to program the object sprites to give a clue to the player whenever the boy-sprite touches them. Click on the icon for the first object (ie the flower-vase - Sprite1). From the Control Blocks Palette, attach a Forever loop block to the bottom of the when Green Flag clicked Script Now insert an If loop block inside the loop of the Forever block. |
| From the Sensing Blocks Palette, insert a diamond-shaped touching [ ]? block into the diamond-shaped pane of the If block Edit the block so it now reads If [touching [Sprite6] ]? This instructs the Script to do whatever is in the If loop when this Sprite touches the boy-sprite (Sprite6) |
 |
 |
From the Looks Blocks Palette, insert a think [ ] for [ ] secs block into the If loop. Edit the think block so it reads think [Nothing here, try sleeping on it!] for [2] secs |
| Now copy this entire script to the next Sprite (ie the beachball - Sprite2) by dragging and dropping it over the icon for the Sprite |
 |
 |
Click on the icon for the beachball Sprite and remove the older when Green Flag clicked script from the Script Area (by dragging and dropping it in the Blocks Palette Area) Edit the think block in the new Green Flag Script so it reads something like: think [Nothing here, fancy a snack?] for [2] secs |
| Drag and drop this script on to the next Sprite icon (ie the cheesy-puffs) and then remove the older Green Flag Script and edit the new one so the think block says something such as: think [Nothing here, go dig for it!] for [2] secs |
 |
 |
Drag and drop the script on to the next sprite (ie the rock) and amend the rock sprite's script so it says something such as think [Nothing here, try the shed] for [2] secs |
| Finally, drag and drop the script on to the icon for the bike sprite and edit the think block for the bike's script to say think [Happy Birthday!] for [2] secs |
 |
 |
Now test the game by pressing the Green Flag button. You will notice there is one strange bug which we need to sort out. When the boy-sprite moves from right to left across the stage he flips upside down. This is easy to de-bug. Stop the game by pressing the red button (next to the Green Flag) |
| Click the icon for the boy-sprite (ie Sprite6) in the Sprite List Area and then click the only face left-right button above the Script Area beside the image of the boy-sprite Now when you test the game he will remain upright. |
 |
 |
Just a final bit of tidying-up. You will notice that the xpos and ypos variable labels appear on the stage area. This would be OK if the variables were showing the score or a timer, but they are not really necessary in this game. Stop the game by clicking the Red button In the Variables Blocks Palette, uncheck the checkboxes beside the xpos and ypos label blocks This will remove them from the Stage Area. |
| Lastly, let's tell the game to stop when the player finds the present. Click on the icon for the bike sprite (Sprite5) From the Control Blocks Palette, insert a Stop all block into the If loop below the think block. Now when you test the game it will stop when you reach the bike. |
 |
Extensions
- Clearly, the best way to extend this game is to add more 'rooms' and make the adventure longer.
- You could include more objects in each room and maybe add some clues which are 'red herrings'
- Rather than having the directions to rooms shown on the background image, these could be communicated when the object is touched by the sprite
- To make the adventure more challenging, you could have some objects revealed only after other tasks have been completed. For example, Thomas could be sent out to the garden to find a flower which he then brings back to the vase. Only once he's found the flower is he given the next clue by the vase. This will require an additional 'flag' variable. When the flower is touched, the 'flag' variable is set to, say 3, when the vase is touched AND the flag variable is 3, then a different message is given. Through the use of a flag variable, adventures can become a lot more challenging (eg the shed can only be opened if the key has been found, etc.)
No comments:
Post a Comment